Showing posts with label Cakes/Cake Pops. Show all posts

Sunday, 10 June 2018

Vegan Fruit and Nut Flapjacks


Breakfast is the most important meal of the day. A lot of people skip breakfast and then get hunger pangs mid morning. I enjoy oats for breakfast, either made as overnight oats in the summer or hot porridge with fruits in the winter. I also love healthy snacks when I need breakfast on the go. These Fruit and Nut Flapjacks are the excellent choice.They contain no refined sugars and are gluten and dairy free and they are made with the finest organic fruit and nuts from the Indigo Herb company.


Indigo Herbs based in Glastonbury in Somerset have a great ethos they think the path to health starts with taking responsibility for your body, mind and soul. The second step is making the change by working some healthy routines into your daily lifestyle. On their website they supply a broad and unique range of quality products to include in your daily lifestyle, from breakfast, lunch and dinner, to everything in between.


Breakfast, Snack
Vegan, Vegetarian
Yield: 1 Tray 16 Squares.Pin it
Fruit and Nut Flapjacks

Prep time: 10 mins Cook time: 30 mins Total time: 40 mins
Gluten, dairy free and refined sugar free fruit and nut flapjacks that make the perfect breakfast or mid morning snack.

Ingredients:

Dry Ingredients:
2.5 cups Organic oats
1 cup  Indigo Organic dried apricots and figs finely chopped.
1.5 cups mixed Indigo Organic nuts almonds, cashew nuts, walnuts coarsely chopped.
0.5 cup  Indigo Organic coconut palm sugar.
2 teaspoons  Indigo Organic Baobab powder.

Wet Ingredients:
1/3 cup sunflower oil.
1/2 cup almond milk.
1 teaspoon vanilla.

Instructions:

1. Preheat the oven to 150 degrees C/ 300 degrees F
2. Line a square baking tray with parchment paper.
3. In a bowl add all the ingredients except the milk and mix together.
4. Stir in the almond milk a little at a time, until mixture binds together but don't make it too wet. (You may not need to use all the milk)
5. Transfer the mixture into the prepared baking tray and tightly pack it down using the back of a spoon. This is important as it will ensure when you cut the flapjacks they don't fall apart.
6. Bake in the preheated oven for 20 minutes at 150 degrees C  and another 10 minutes at 180 degrees C. 
7. The flapjacks should be a rich golden brown colour.
8.  Remove from the oven and allow to cool fully before cutting into slices or squares.

NOTES:

NB- You can add any dried fruits or nuts of your choice.
Created using The Recipes Generator


If you enjoy visiting simplyfood and would like to receive regular updates and a monthly newsletter straight into your inbox please sign up by email. You will find the email and newsletter signup right at the top under my photo in the side bar.


Alternately click the link below for email signup.:


This post is in collaboration with Indigo Herbs’s


Thursday, 29 March 2018

Lemon, Rose and Pistachio Mini Bundt Cakes~Recipe Swap


This is the second time I am participating in the recipe swap club. The aim is that you are paired up with a fellow blogger and you have to recreate a recipe from their blog. This month I was paired with Jagruti from Jagruti’s Cooking Odyssey. Jagruti is a very good friend of mine and she has a lovely blog show casing vegan and vegetarian recipes. She is an expert cook and experiments with lots of textures and flavours. I spent hours looking through her blog and there were so many recipes I wanted to make. I short listed a few of my favorites such as her Instant Raiti Gor Keri -sweet mango pickle, her vegan Boussou Tmssou- Algerian cookies and her Rasjasthani Dal Bafla recipe to name a few. But what caught my eye was her recent post where she featured her Middle Eastern semolina Bundt cakes. The rose and lemon combination with the pistachio are my favorite flavours so I decided  to recreate this recipe at the weekend. Wow what a hit, we loved this mini gorgeous spongy cakes that oozed Middle Eastern flavours to the core. This is definitely a keeper recipe that I can see my self making it again and again.

I did make a couple of small changes to suit my taste, the original recipe can be found here.


I have a mini bundt tin so I made mini bundt cakes rather than 4 large as in Jagrutis recipe. I also reduced the amount of sugar syrup in the recipe to a half and it was more than enough to sweeten the little cakes. The cakes turned out delicious served with strong Moroccan coffee.


print recipe


Lemon, Rose and Pistachio Mini Bundt Cakes
Mini bundt cakes with mouth watering middle Eastern flavours of rose, lemon and pistachio make these cakes delectable and simply delicious.
Ingredients:
  • 250 g Coarse Semolina
  • 1 tablespoon Corn flour
  • 85 g Melted butter
  • 85 g Caster Sugar
  • 125 g Plain Greek Yoghurt
  • 1 tablespoon Lemon zest
  • 1 pinch Salt
  • 1 level teaspoon Bicarbonate of soda
  • 30 ml Milk
  • 2 tablespoons Pistachio slices
    For the Syrup
  • Sugar 125 g
  • 150 ml Water
  • 1 Lemon (thinly sliced)
  • 1 teaspoon Rose water
  • 2 tablespoons Lemon juice
  • Few Rose petals for garnishing
Method:
1.Preheat oven to 180 degrees -C 375 degrees F 2.In a bowl add the bicarbonate of soda and yoghurt and mix together. Leave aside for 10 minutes.3. In another bowl add the semolina, sugar, lemon zest, melted butter and mix together.4. Add in the yoghurt mixture and mix together, add the milk a little at a time until the batter is dropping consistency.5. Grease and dust the bundt tin with melted butter and flour.6. Spoon the batter into the prepared tin and bake in the oven for 20 minutes, or until cakes are golden brown and a skewer inserted in them comes out clean.7. In another pan add the sugar, water, lemon juice, lemon slices and bring the mixture to a boil, once the sugar has melted simmer on low heat for 5 minutes .Turn off the heat and add the rose water.8. Leave the cakes in the bundt tin after taking them out of the oven. While they are still warm, spoon on top of each cake a generous spoonful of the syrup. Wait a few minutes and add another spoonful. 9. Once the cakes have soaked up the syrup, gently take them out of the bundt tin and arrange them on a serving platter, spoon another teaspoon full of syrup on the cakes and garnish them with the pistachio slices and rose petals.
Details
Prep time: Cook time: Total time: Yield: 12 cakes

Thursday, 15 February 2018

Gluten free Orange and Poppy Seed Cake


Recently I have been trying to find recipes for cake that are gluten free as I have a friend who is gluten intolerant. Unfortunately I have not been very successful. My cakes are either too dry and crumbly or are really dense. I have yet to find a recipe that gives me the perfect texture. If any of you readers have tips that work, please do share in the comments below.

I am really pleased that in the interim I have found a cake mix that really works.


This gluten free Orange and Poppy Seed cake by far is the best I have ever made, its from a packet mix from Marks and Spencer's new range. All I was required to add to the packet mix was oil, two eggs, poppy seeds and whisk and bake. It was delicious. However I am going to try the recipe next time without the eggs and by adding an egg substitute so will share my results soon.


print recipe

Gluten Free Orange and Poppy Seed Cake
A delicious light and airy cake with a subtle orange citrus flavour.
Ingredients:
  • 1 box Marks and Spencer's Orange and Poppy Seed cake Mix
  • 1/2 teaspoon Poppy Seeds
  • 100 ml Light Olive Oil
  • 2 Medium Eggs
  • 50 ml Water
  • 3 tablespoons Sugar
  • 2 tablespoons Water
  • 3 Clementines
  • Dairy free coconut yoghurt for serving.
Method:
1. Preheat the oven to 180 degrees C and line a 2 lb loaf tin with paper.2. Peel and slice the clementines in rounds and place them in a pan with 2 tablespoons water and 3 tablespoons sugar and bring to a slow simmer, lower heat and cook for 10 minutes and turn off the heat , keep aside to add as garnish o the cake.3. In a bowl add the oil and water and eggs and whisk together.4. Add the cake mix and fold gently.5. Pour the cake batter into the prepared loaf tin and bake in the pre heated oven for 30 mins or until cake is golden brown and a skewer inserted in it comes out clean.6. Remove the cake from the oven and leave to cool.Once cooled transfer the cake to a serving dish and spoon over the cake the prepared clementine slices.
Details
Prep time: Cook time: Total time: Yield: 1 loaf cake


Sunday, 22 January 2017

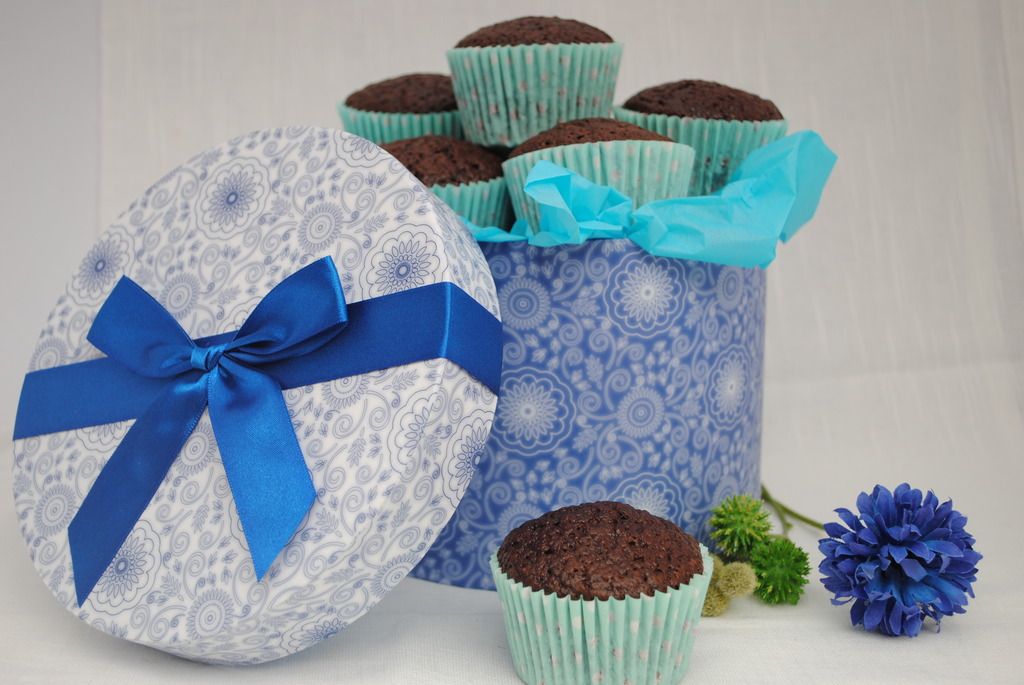
Eggless Chocolate Cupcakes


I do like a cake every now and then with my cup of coffee, however I am not too fond of buttercream and fondant icing on the cake. I am a plain cake person with just good flavour and no topping. I love chocolate cakes and this vegan recipe with no eggs or butter is so delicious that it is one of my most favourite recipes. It is also very easy to adapt the recipe if you want to add other flavours in cake.


print recipe

Eggless Chocolate Cupcakes
Moist and deliciously chocolatey cupcakes, that are egg and dairy free.


Ingredients:


     Dry Ingredients:
  • 1.5 cups Plain Flour
  • 1/4 cup cocoa powder
  • 1/2 teaspoon bicarbonate of soda
  • 1/2 teaspoon of baking powder
  • 1/2 teaspoon salt
  • 3/4 cup white caster sugar
  • 1/2 cup Milk chocolate chips 
Wet Ingredients:
  • 1 cup Water
  • 1/3 cup Sunflower oil
  • 1 tablespoon apple cider vinegar
  • 1 teaspoon vanilla essence

Method:
1. Preheat oven to 180 degrees C 2. Line a muffin pan with cake cases.3.  In a large bowl sieve the flour, cocoa, salt, baking powder, bicarbonate of soda three times to get lots of air in the mixture.4. Stir in the sugar.5. In a jug add the water ,oil, vinegar and vanilla essence and whisk together.6. Gently fold the wet ingredients into the dry and do not over mix, you want to keep the mixture as light as possible. Stir in the chocolate chips. 7.  Spoon the mixture into the cake cases and bake in the preheated oven for 25 minutes or until a skewer inserted in the cakes comes out clean. Once baked remove tray from oven and wait for the cakes to cool. At this stage you can swirl butter cream on the top if desired.
Details
Prep time: Baking time: Total time: Yield: 16 cupcakes depending on size of cake cases.


For other eggless recipes do check out the posts for more cake ideas here.

Friday, 2 December 2016

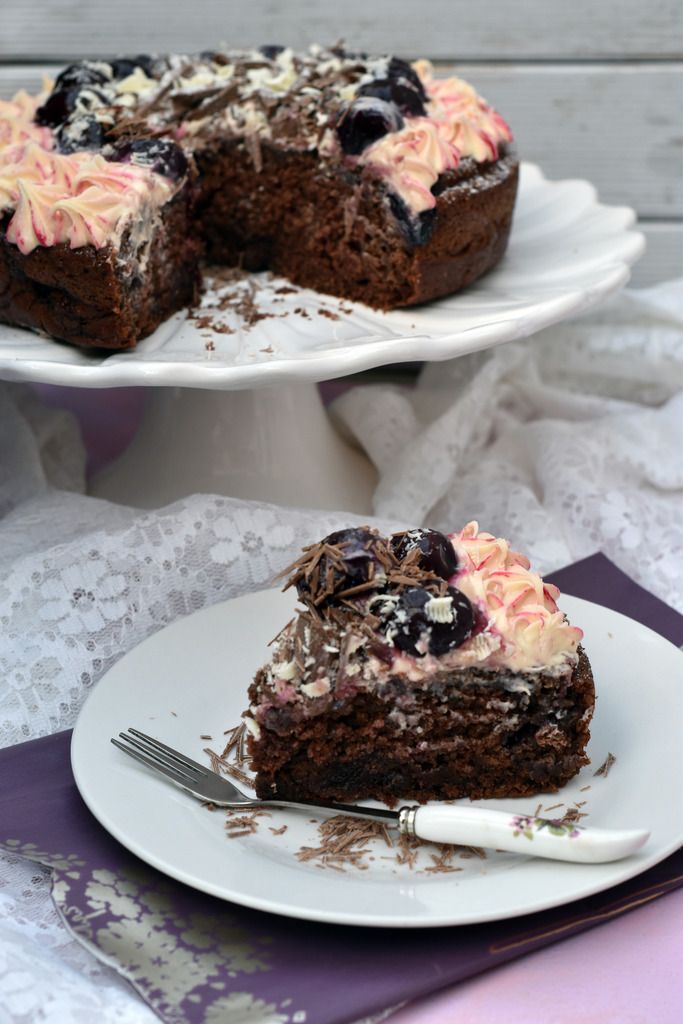
Eggless Black Forest Cake


Since the Great British Bake off series was on I have been baking more than I usually do. I joined in a bloggers baking group on face book where a group of amateur bakers took inspiration from the shows weekly challenges and recreated the  many bakes that the contestants made. I really had fun participating and making new friends. It was a big learning curve for me, where I attempted things like homemade phyllo pastry, churros and mousse cake. All these bakes were really out of my comfort zone but the show really inspired me to rise to the challenges.
This week I was well and truly surprised when I heard that Tesco who were sponsoring the Bloggers bake had selected three winners, I am most excited to have come second place which is totally unexpected.


In  celebration of this win I have made an eggless black forest cake, Black forest gateau is one of my favourite flavours so this is a variation of it.


print recipe

Black Forest Cake
Delicious and moist chocolate cake flavoured with morello cherries and decorated with whipped cream and morello cherries and chocolate shavings.
Ingredients:
  • 300 g plain flour
  • 240 g sugar
  • 1/2 teaspoon salt
  • 1/2 teaspoon bicarbonate of soda
  • 1/2 teaspoon baking powder
  • 60 g cocoa powder
  • 75 ml sunflower oil
  • 220 ml water
  • 410 g black cherry pie filling
  • 1 tablespoon apple cider vinegar
  • 1 teaspoon vanilla extract
  • 240 ml whipping cream
  • 60 g icing Sugar
  • Dark chocolate shavings 
Method:
1. Preheat the oven to 180 degrees C/ 350 Degrees F.2. Grease a loose bottom cake tin and line it with grease proof paper.3. Sift the flour, baking powder, bicarbonate of soda and cocoa in a large mixing bowl.Stir in the sugar.4. In a jug add the oil, water,vanilla essence and vinegar and mix together 5. Fold the wet ingredients from the jug into the sifted flour mixture.6. Open the can of cherries and remove half the cherries and keep them a side for garnish. The remaining juice and cherries add to the cake batter and fold gently. Transfer the batter to the cake tin and bake in the preheated oven at 180 degrees C for 45 minutes or until a skewer inserted in the cake comes out clean.7.While the cake is baking, add the cream to a bowl and whisk it with the icing sugar to form stiff peaks. Spoon the cream into an icing bag fitted with a star nozzle. and keep the cream in the fridge to chill.8. Once the cake is baked, remove it from oven and allow it to cool for 10 minutes in the pan, then remove it from the tin and leave to fully cool on a wire rack.9. Transfer the cooled cake onto a serving dish and pipe circles of rosettes on the the top of the cake with the cream. In the centre add the remaining cherries.Garnish with some dark chocolate shavings to finish off.
Details
Prep time: Cooking time: Total time: Yield: 1 cake /8 slices


I baked my cake in my new non stick 100% leak proof and watertight PushPan. The PushPan is easy to use, it 's base is sealed by a silicon gasket which prevents any leaks whilst baking. The pan ensures an even bake. it is dishwasher safe, ovenproof and freezer safe too. The PushPan range comes in various sizes and are perfect for all types of baking.


I was sent a press sample of the PushPan to test out, all views and opinions are my own. The PushPan  photos are used with permission.

As always simplyfood likes to give readers a chance to try the products we use in our kitchen. I am excited that I have 1 PushPan  to giveaway to one lucky winner.

How To Enter:
  • Simply complete the Rafflecopter widget below to verify your entries
  • Entries can be via blog comment, Facebook, Twitter etc
  • This competition is open to UK residents OVER 18 YRS  only .Please read the rules below .
  • Leaving a blog comment is mandatory and failure to do so will void any other entries.
  • Closing date - 18th Dec 2016 12.00 am
  • Prize 1 8 inch PushPan
How Rafflecopter works:

·        You will need to complete the mandatory entry first – usually making a blog comment. You can do this by clicking on leave a comment at the bottom of the post and leaving your reply in the comment box.Please note your comment will not show immediately as it needs to be moderated however rest assured it will appear on the site, so carry on with rest of entries.
·        Login to Rafflecopter – click to see what the question is. Make a comment answering the question on the blog.
·        Go back to Rafflecopter and click the green button to tell me you have made a comment, this will unlock all the other options. All entries are checked to see that the mandatory question is answered, if its not all bonus entries will become void. 
·        Rafflecopter will tweet, like and follow on your behalf.
·        For information on how to find the URL of your tweet click here
·        For bonus entries you can return to this page and enter the daily bonus entries. 
·        If you are still unsure as to how Rafflecopter works please do check out this short video.
 a Rafflecopter giveaway

Friday, 21 October 2016

Halloween Mandarin and Pistachio Cake


Its national baking week so I needed no further encouragement to bake a delicious cake, however my sandwich cake tins were looking a little sad so as a special treat I replaced them with two 20 cm non stick loose bottom tins from Homesense. They are perfect for lifting the cake out and also really good quality as they do not distort or buckle in the oven. There is wonderful range of bake ware available at Homesense and it was really hard not to over indulge and buy the whole shop.


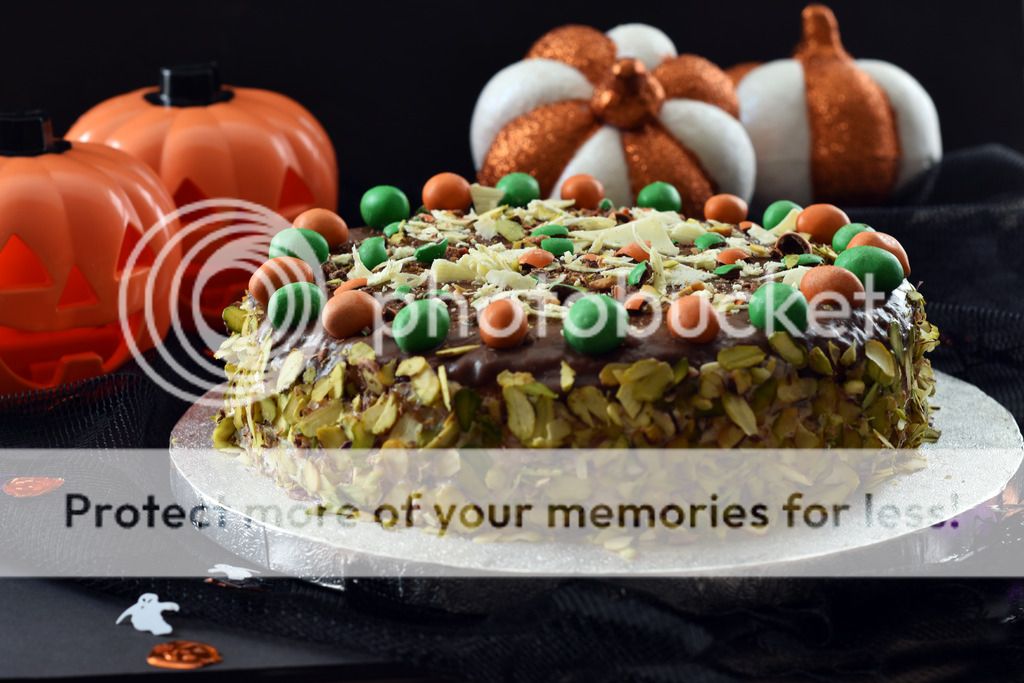
I adore the combination of chocolate and nuts and this delicious mandarin and pistachio cake fits the bill perfectly. It is flavoured with Mr Organic Mandarin Conserve, filled with mandarin butter cream and topped with a chocolate ganache and the sides are coated with flaked pistachios. Is your mouth salivating well there is more to come.....


The cake is finally garnished with chocolate coated peanuts (M&M) and white chocolate shavings, crushed chocolate peanuts and flaked pistachio nuts. It is a cake that is simply delectable and one slice is most certainly not enough!!!!!


print recipe

Halloween Mandarin and Pistachio Cake
Beautiful citrus flavours combined with chocolate and pistachio nuts makes this cake moist and delicious.
Ingredients:
  • 200 g Caster Sugar
  • 200 g Butter
  • 200 g Self raising Flour
  • 4 Eggs (or egg replacer equivalent to 4 eggs)
  • 1 teaspoon Baking Powder
  • 2 tablespoons Mr Organic Sicilian Mandarin Conserve
  • 2 tablespoons Warm water
For Chocolate Ganache:
  • 100 g Milk Chocolate
  • 170 ml Double cream
For Decorating:
  • 100 g Flaked Pistachio nuts
  • 30 g White chocolate
  • 30 Chocolate covered Peanuts (M&M)
For Butter cream:
  • 150 g Softened Butter
  • 2 tablespoons Sicilian Mandarin Conserve
  • 300 g Icing sugar
Method:
1. Preheat the oven to 180 degrees C.2. Grease and Line two 20 cm cake loose bottom cake tins.3. Add the butter and sugar to a mixing bowl and cream together until light and fluffy, 4. Sieve the flour and baking powder in to another bowl.5. Add the water to the Sicilian mandarin conserve and mix it together. Add this to the butter and sugar mixture.6 .Add the eggs to the butter mixture and whisk together.7. Fold in the flour with a metal spoon.Divide the mixture into the two prepared cake tins and bake in the preheated oven for 20-25 minutes until golden brown and a skewer inserted in the cake comes out clean. Remove cakes from oven and cool them fully. Once cooked remove them from the tins onto a wire rack.8.Make the butter cream by whisking together the remaining butter, icing sugar and the Sicilian mandarin conserve.9. Break the chocolate into small pieces and put it into a large bowl.10. Warm the cream up and pour it over the chocolate, wait for the cream to melt the chocolate and them mix it to make the ganache. 11. To assemble the cake place one of the cakes top side down onto cake board. Spread some butter cream in the centre and place the second cake top side up onto the cream to make a cake sandwich.12.Using a palette knife spread the remaining butter cream onto the sides of the cake and then stick the flaked pistachio nuts onto the sides.13. Spread some chocolate ganache on top of the cake, do not over do the topping as we not want the chocolate to run down the sides. Arrange the chocolate covered peanuts around the cake and grate some white chocolate shaving in the centre. Also sprinkle some crushed chocolate peanuts and a few pistachio flakes on top of the cake.
Details
Prep time: Cook time: Total time: Yield: 1 cake


This recipe is in Collaboration with Homesense in celebration of  National Baking Week.

Sunday, 9 October 2016

Mini Genoise Mousse Cakes


Week 7-Dessert week of GBBO has been and gone and the challenges to my mind are getting harder and harder. This week we saw contestants  make Roulade as the signature challenge, followed by technical challenge of making Marjolaine, a layered meringue with cream and nuts followed by the show stoppers Mousse cakes. All the bakes looked extremely difficult and you could clearly see the stress on the contestants faces as they struggled to create the perfect bake.

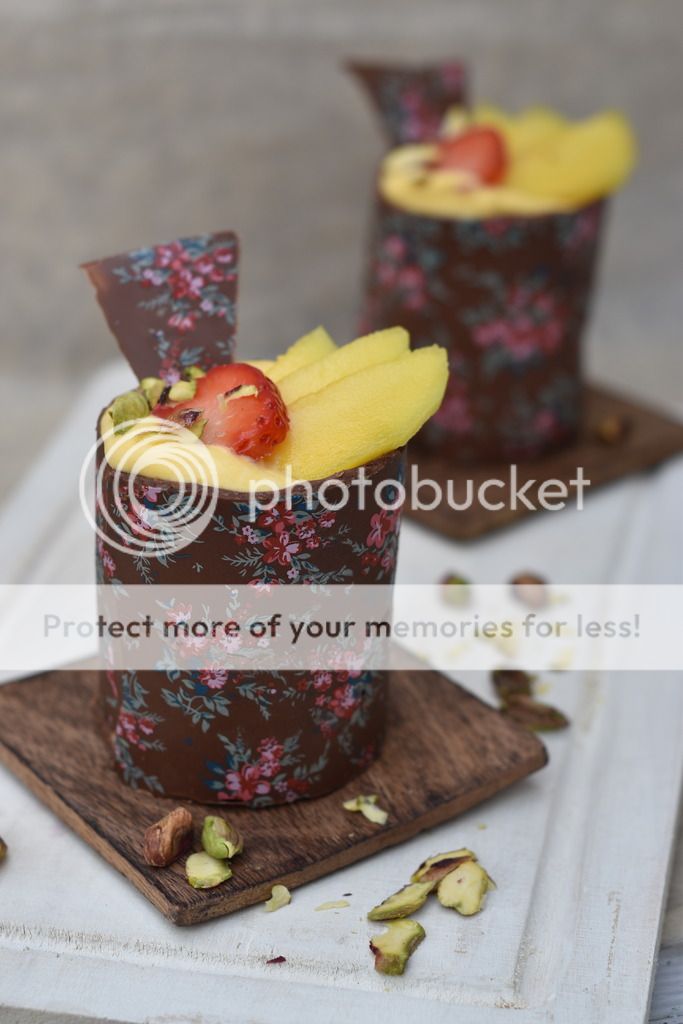
This week I have attempted to create my own version of the mini mousse cakes. I have used a vanilla genoise sponge recipe from GBBO and made a vegetarian mango and cardamon mousse topped with fresh mangoes and strawberries and finally finished off with a decorated chocolate collar around the mini cakes.

Some of the ingredients for my challenge this week were provided by Tesco


print recipe

Mini Genoise Mousse Cake
Light Genoise sponge topped with delicious cardamon mango mousse and garnished with fresh mango and strawberries and pistachio nuts.
Ingredients:
  • 50g butter (melted)
  • 100g sugar
  • 4 eggs
  • 140g Plain flour (sifted 3 times)
  • 120g Whipping cream
  • 2 tablespoons Icing sugar
  • 120g mango puree
  • 1/2 teaspoon Cardamon powder
  • 1/2 teaspoon Vanilla essence
  • 8 Strawberries
  • 1 Fresh mango
  • 200g Milk chocolate
  • 10 pistachio nut sliced
  • 1 sheet Edible chocolate transfer
Method:
1. Preheat the oven to 200 degrees C/ 400 degrees F2. Line a square tin with grease proof paper and keep it aside.3.Place the eggs and sugar in large bowl and set it over a bowl of barely simmering water, making sure the bottom of the bowl does not touch the water. Beat with an electric whisk until the mixture is thick and fluffy then remove the bowl from the pan and continue beating for three minutes.4. Add the melted butter and then gently fold in the flour.5.Transfer the batter to the prepared cake tin and smooth the top.6.Bake the cake for 25 minutes or until a skewer inserted in the centre comes out clean.7. Remove cake from the oven and leave to cool.8.To make the mousse, whip up the cream with the icing sugar until it forms stiff peaks.9. Fold in the mango puree, cardamon and vanilla essence very gently. Place the mousse in the fridge to chill.10 Peel the mango and cut it into thin slices.Hull the strawberries and cut them into thin slices.11.Using a cookie cutter that is 6 cm in diameter, cut 6 round cakes from the large cake, any off cuts can be used for making trifle.12. Break the chocolate and melt it in the microwave at 30 sec intervals until its melted. Remove from the microwave and keep aside.13. Cut the chocolate transfer paper to fit around the cake rounds and cut 6 sheets. Make sure they are at least 1 inch taller than the cake as there will be need to be a cavity to fill the mousse.14. Place the chocolate transfers on a baking sheet and using a palette knife thinly spread the melted chocolate on the design,15 Place the tray in the fridge for the chocolate to semi set for about 5 minutes.16 Remove chocolate wrapper from fridge and wrap them around the cake rounds. Return the chocolate wrapped cake back to the fridge to set completely. (about 1 hour)17. Remove the chocolate covered cakes from fridge and gently peel off the plastic wrapper to expose the chocolate design.With a sharp knife level the top of the cups.18. Spoon the mousse on top of the cakes and return the cakes to the fridge for 30 minutes.The mousse has no gelatin so it will not set fully but the chocolate sides of the cake will hold the mousse.19. To serve garnish the mousse cakes with mango slices and strawberry slices and sprinkle pistachio slices.
Details
Prep time: Cook time: Total time: Yield: 6 mini cakes


Submitting this to :
Great Bloggers Bake Off with Jenny from Mummy Mishaps.


Monday, 29 August 2016

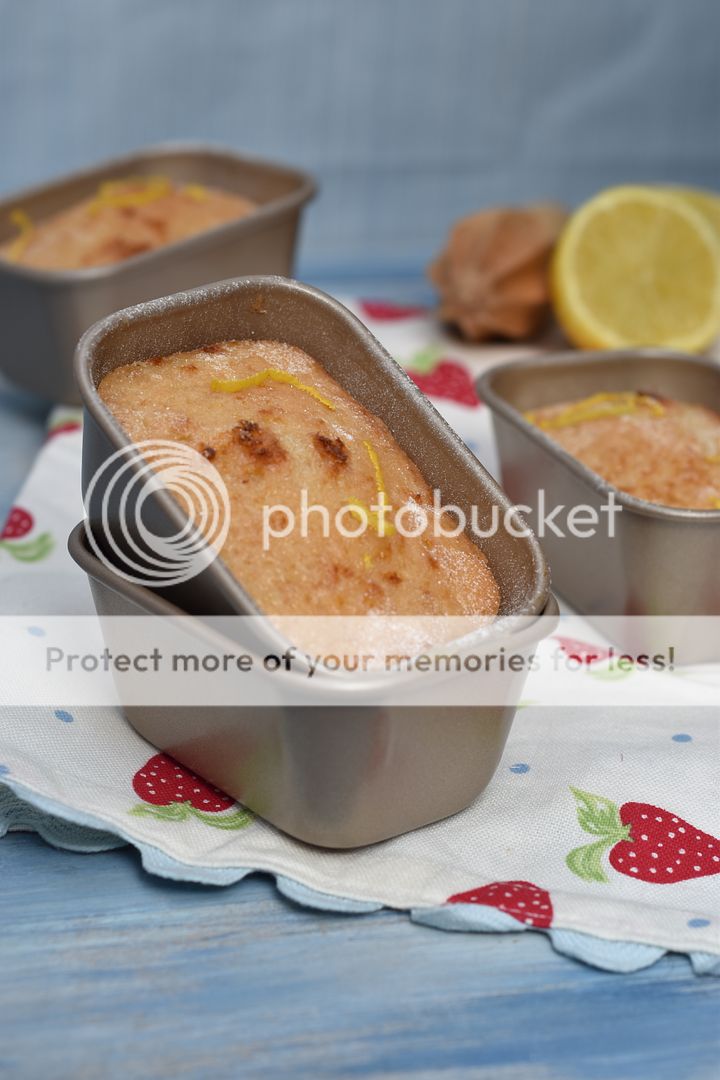
Eggless Lemon Drizzle Mini Loaf Cakes


Last week was the start of the Great British Bake off Series 7. I am a huge fan of this awesome show and really enjoy watching all the challenges and creations that the participants partake. I love the docile Mary Berry and the candid Paul Hollywood with his piercing blue eyes that are enough to give you the shakes!!! I was fortunate to have had the opportunity to make some bread with Paul at a recent bloggers event.You can read all about it here .

On last weeks GBBO episode we saw bakers bake a Drizzle cake, make Jaffa cakes and create a show stopper of a Genoise cake with a mirror glaze. I was totally inspired by the drizzle cakes and so here I am sharing my bake: Eggless Lemon Drizzle mini loaf cakes.

Citrus flavours really pair well with lots of fruits and one combination I really like is lemon with berries.The blueberries in this Lemon Poke Cake give it a lovely flavour and makes the cake look so pretty when cut.


print recipe

Eggless Lemon drizzle Mini Loaf Cakes
Decadent and moist eggless cakes with pungent citrus flavours.
Ingredients:
  • 270g Plain Flour
  • 1/2 teaspoon Baking powder
  • 1/2 teaspoon Bicarbonate of Soda
  • 250g Sugar
  • 75ml Sunflower Oil
  • 1 tablespoon Apple Cider Vinegar
  • 3 tablespoons Lemon Juice
  • 220ml Water
  • 1 teaspoon Lemon zest
  • For Drizzle Syrup


  • 30g Sugar
  • 2 tablespoons Lemon Juice
  • 2 tablespoons Water
  • 1/2 tablespoon Icing Sugar for dusting
Method:
1. Preheat oven to 180 degrees C and grease the inside of 8 mini loaf tins.Place the loaf tins on a baking tray.2.Sift together the baking powder, bicarbonate of soda and the flour. Place in the bowl of the Nutri Ninja3. In a jug add the oil, water, lemon juice, lemon zest and apple cider vinegar and mix together.4.Add the wet ingredients to the flour in the Nutri Ninja bowl and whisk the ingredients until it forms a batter. Do not over mix.


5. Divide the batter into the eight loaf tins and place the tins into the middle shelf of the oven to bake for 40-45 minutes util cakes are golden brown and a skewer inserted in the centre of the cake comes out clean.6. Remove cakes from the oven and leave aside to cool.7. To make the drizzle warm the lemon juice, water and add the sugar, wait for it to dissolve and then remove from the heat.8. Using a skewer poke hole in the top of the cakes and spoon the warm syrup into the cakes.Leave the cakes aside for syrup to soak in9. Demold the cakes and sprinkle with a flurry of icing sugar before serving.
Details
Prep time: Cook time: Total time: Yield: 8 mini loaves


I used the Ninja Kitchen System with Nutri Ninja to whisk up my cake mix. The Ninja®Complete Kitchen System with Nutri Ninja® is a power machine that incorporates three appliances, a food processor, high speed blender and a nutrient extractor. Its 1,500 watt of power  is perfect for all kitchen tasks such as mixing, blending, kneading,chopping and whipping.

I am delighted to have this addition to my kitchen as its going to be very handy whilst I create some exciting challenges inspired by the GBBO.


I am also excited to feature the Paul Hollywood bakeware by Kitchen Craft during my GBBO posts. The bakeware is made from extra thick carbon steel which won't warp during baking and will give all your cakes an even bake.The bakeware is dishwasher,fridge and freezer safe. Its100% PFOA, PTFE and BPA-free and comes with  a 20 year guarantee (5 year non stick guarantee). The range is available in most cookware shops.


I was sent the The Ninja®Complete Kitchen System with Nutri Ninja® and the Paul Hollywood bakeware to review in the simplyfood kitchens.

I love the classic lemon drizzle cake, you can also check out some other drizzle cakes below:
Blueberry Loaf Cake with Lime Drizzle by Jac from Tinned Tomatoes
Lime, Coconut and Cardamom Loaf Cake by Choclette from Tin and Thyme
Blackberry cake with Orange drizzle by Jac from Tinned Tomatoes
Apple and Rum drizzled cake by Tracy from its not easy being greedy
Lemon rose and gin drizzle cake by Kevin from The crafty Larder
Submitting this to :
Great Bloggers Bake Off with Jenny from Mummy Mishaps.


Related Posts with Thumbnails